Host your openITCOCKPIT status page on a dedicated domain for seamless monitoring and reliability.
⚙️ How to publish your openITCOCKPIT statuspage like those from tech giants 🚀
What are Status Pages?
In openITCOCKPIT release 4.7.0, the status pages feature has been introduced to the community edition.
This feature allows you to create status pages where you can add services and hosts to a public (or private) page. For more details, check out the release notes for openITCOCKPIT 4.7.0 or refer to the official documentation creating a status page.
Motivation
Most people are already familiar with the benefits of a status page. However, the current implementation in openITCOCKPIT has one small inconvenience: Public status pages are hosted with deep-link URLs like this one:
https://openitcockpit.my-home-net.tld/statusPages/publicView/42.
Inconvenience
While this works, it falls short compared to the status pages of major tech companies like GitHub and Atlassian, which have dedicated domains for their status pages. These companies use subdomains (e.g., status.github.com), providing a sleek, professional experience. In contrast, openITCOCKPIT status pages are hosted under a deep link, which I find less ideal.
Why does this matter? A deep-link status page risks inviting users to explore other parts of the system, potentially stumbling upon the login page and generating unnecessary traffic. I wanted a solution where my status page is both publicly accessible, but the rest of openITCOCKPIT remains secure and hidden from the outside world.
Step 1: Domain Setup
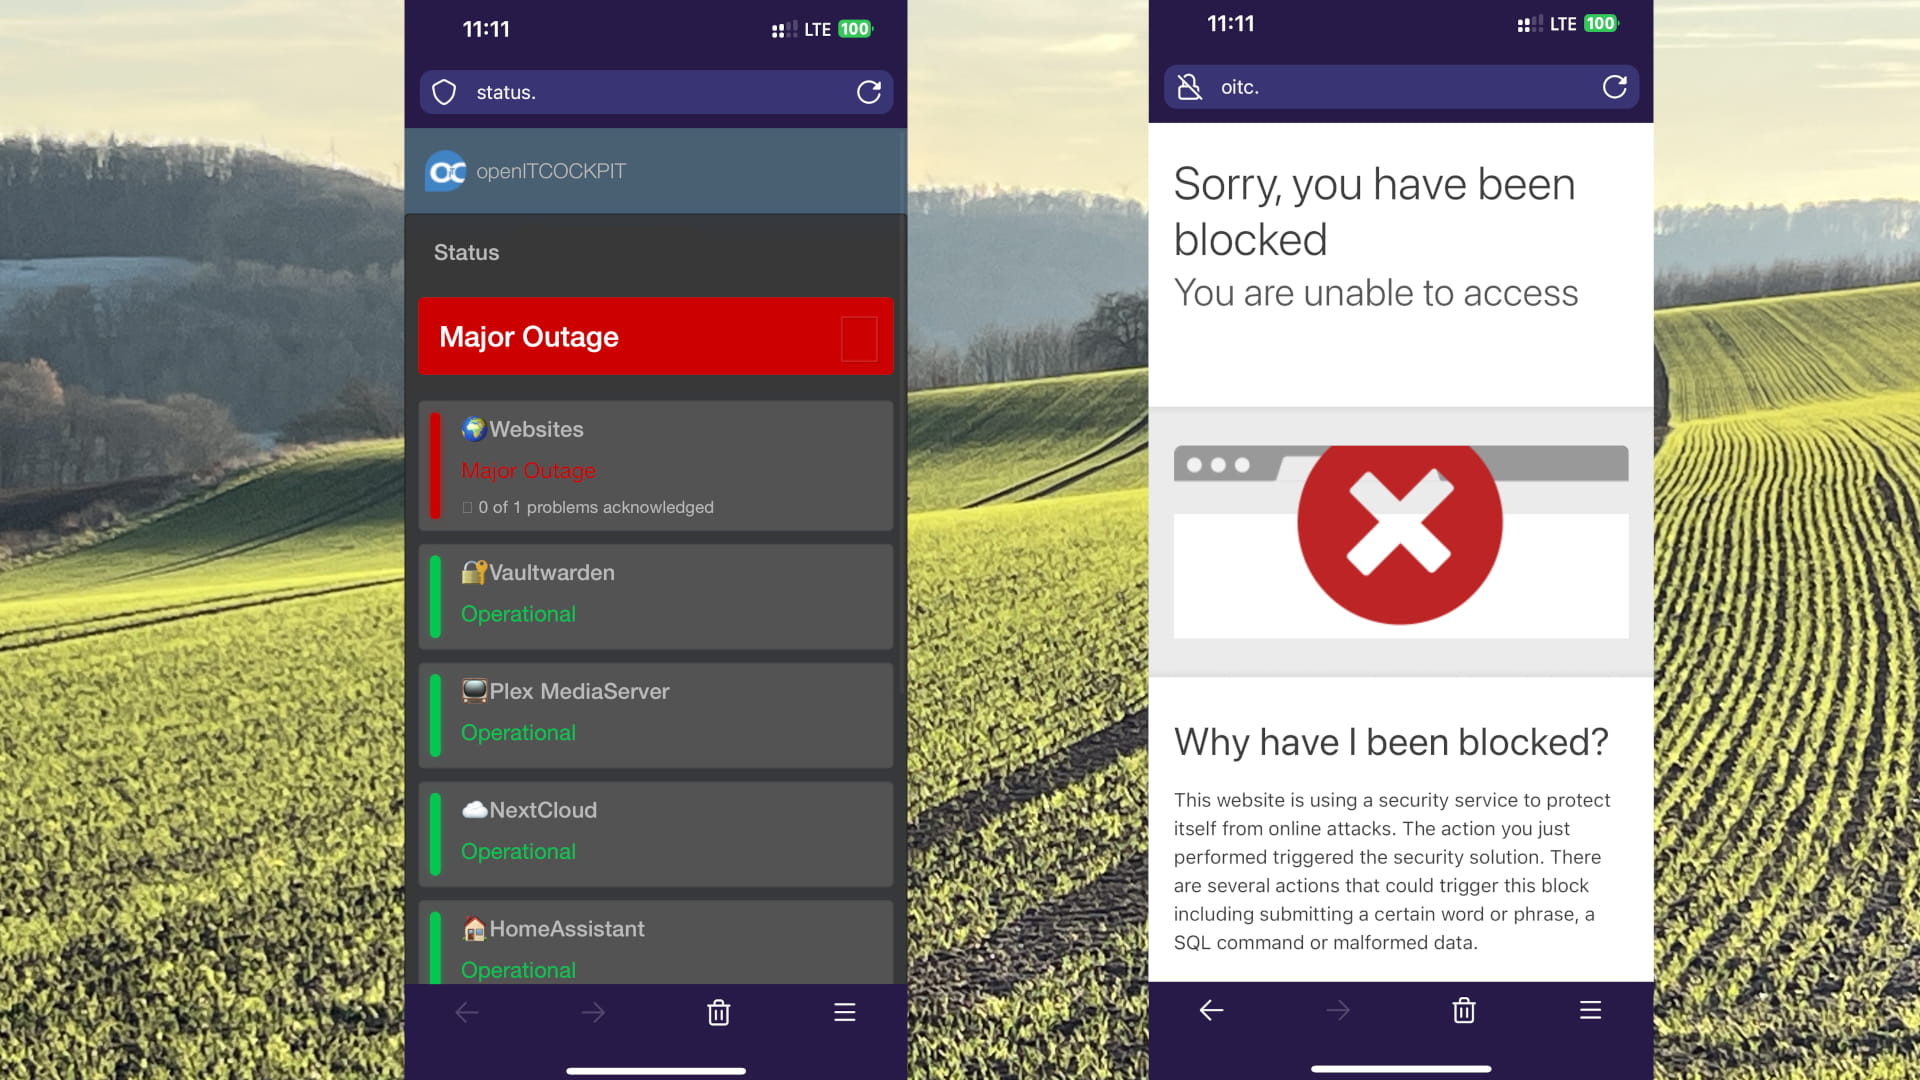
To make my status page look and function like the pros, I configured a custom subdomain. In my case, I set it up on CloudFlare, routing the subdomain to my home lab. Now, my status page is accessible via a clean, professional URL:
https://status.my-home-net.tld
This approach mirrors the style of major tech companies and ensures that openITCOCKPIT’s monitoring system remains private, with only the status page visible to the public.
Step 2: Play with nginx
Next, I set up a nginx web server as a reverse proxy to selectively forward requests to the openITCOCKPIT server.
This was accomplished by configuring specific rules in the NGINX configuration file. The proxy setup includes the following behavior:
- Allow only GET requests to ensure users can only view the status page.
- Force users to the
status.phppage to direct all traffic to the status page. - Redirect the login page to
status.phpto prevent users from accessing the login screen. - Redirect 404 errors to
status.phpso that any invalid requests still land on the status page. - Leave other requests intact to serve JavaScript, CSS, and other static files directly from the openITCOCKPIT server.
# HTTPS Reverse proxy for status page
server {
    server_name            status.my-home-net.tld;
    listen                 443 ssl http2;
    ssl_certificate        /etc/ssl/my-home-net.tld/cert.pem;
    ssl_certificate_key    /etc/ssl/my-home-net.tld/privkey.pem;
    ssl_protocols          TLSv1.2 TLSv1.3;
    ssl_ciphers            "EECDH+ECDSA+AESGCM EECDH+aRSA+AESGCM EECDH+ECDSA+SHA384 EECDH+ECDSA+SHA256 EECDH+aRSA+SHA384 EECDH+aRSA+SHA256 EECDH+aRSA+RC4 EECDH EDH+aRSA HIGH !RC4 !aNULL !eNULL !LOW !3DES !MD5 !EXP !PSK !SRP !DSS";

    # I will force a 301 on every request that is not a GET request
    if ($request_method != GET) {
        return 301 /status.php;
    }

    # Force status.php to be the index page.
    location ~ ^/$ {
        return 301 /status.php;
    }

    # Force redirect the openITCOCKPIT login page to the status page
    location /users/login {
        return 301 /status.php;
    }

    # Just here for the lulz - Doesn't bother me but better safe than sorry
    error_page 404 /status.php;

    # Not working, still the ideal way imho
    index status.php;

    # proxy the status.php file to the actual statuspage from openITCOCKPIT
    location /status.php {
        proxy_pass https://openitcockpit.my-home-net.tld/statuspages/publicView/1;
        proxy_set_header HOST $host;
        proxy_set_header X-Real-IP $remote_addr;
    }

    # proxy the other requests directly to openITCOCKPIT
    location / {
        proxy_pass https://openitcockpit.my-home-net.tld;
        proxy_set_header HOST $host;
        proxy_set_header X-Real-IP $remote_addr;
    }
}
The result
Long story short, the outcome met my expectations:
- The status page is now publicly accessible on the internet.
- The rest of openITCOCKPIT remains hidden and is not accessible from outside.
Some Thoughts…
While this NGINX configuration is just a small part of the overall setup, I’m not certain it’s the optimal solution, but it certainly gets the job done.

